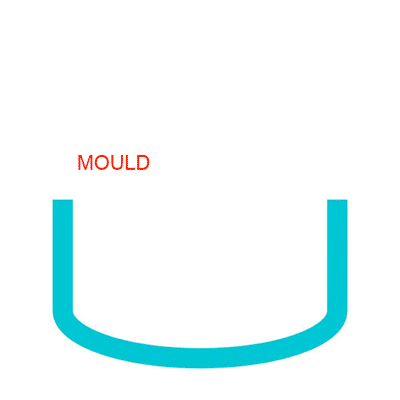
As the winds howl and the temperatures plummet, bass fishing in the Lone Star State transforms into a battle of wits and willpower, where only the boldest dare to venture forth. But fear not, fellow warriors, for with the right tools and tactics, victory is within reach. Prepare to unleash your inner Viking as we delve into the realm of bass winter fishing in Texas, armed with the mightiest weapon of them all: the Iceland Cooler.
Arm Yourself with the Right Tools
In the frigid waters of winter, preparation is key to survival. You must arm yourself with the most formidable gear at your disposal. Enter the Iceland Cooler, a stalwart companion forged in the fires of adventure and crafted to withstand the harshest conditions. With its rugged, roto-molded construction and unrivaled insulation, this mighty vessel will keep your provisions 'Iceland cold' throughout your journey, ensuring that your victory feast remains untainted by the frosty grip of winter.
Where to Find Bass
But where do these creatures lurk during the frosty months?
First in our sights is Lake Fork, nestled east of Dallas-Fort Worth, near the rustic town of Emory. This legendary stronghold is famed for its population of largemouth bass, particularly when February's frost grips the land. Here, anglers from every corner gather, ready to test their mettle against these fierce adversaries.
Venturing eastward, we encounter the mighty Colorado River, coursing its way east of Austin. This meandering watercourse is a true jewel for bass aficionados, offering prime fishing grounds even in the depths of winter's chill. Keep watch for those fleeting warm spells, signaling the arrival of largemouth and Guadalupe bass eager to soak in the sun's fleeting warmth.
But let's not overlook the serene waters of Lake Raven, nestled within the breathtaking Huntsville State Park. Amidst its scenic splendor, this tranquil lake harbors a bustling population of largemouth bass, a year-round delight for anglers. As winter's grip tightens, anticipate the fishing action to intensify, with bass prowling the depths in search of their next meal.
Master the Art of Cooler Packing
In the heat of battle, every advantage counts. Properly packing your cooler is essential to maintaining the freshness and integrity of your provisions. Begin by preheating your cooler with warm tap water to create a warm sanctuary for your food and drinks. Line the bottom with towels or cloths to provide an extra layer of insulation, then carefully arrange your supplies, ensuring they are well-protected from the elements. Use layers of insulation, such as aluminum foil or crumpled newspaper, to fill any air spaces and prevent heat from escaping. With your provisions securely stowed, seal your cooler tight and prepare for the adventure that lies ahead.
Unleash Your Inner Berserker
As you set out into the frozen wilderness, channel the spirit of the berserker within you. Embrace the challenge with unbridled ferocity and unwavering determination, for only those who dare to push beyond their limits will emerge victorious. With each cast of your line and each battle with the elements, forge your legend as a fearless warrior of the winter waters. And when the day is done and the spoils of your conquest lay before you, raise your horn in triumph and celebrate the thrill of the hunt.
Prepare for the Journey Ahead
As you embark on your quest for bass in the winter wilds of Texas, remember that fortune favors the bold. Arm yourself with the might of the Iceland Cooler and embark on a journey that will test your mettle like never before. So gather your gear, rally your fellow adventurers, and prepare to chart a course into the frozen frontier. The bass await, and the thrill of the hunt beckons.
In the midst of winter's biting cold and freezes, your trusted Iceland Cooler becomes more than an icebox — it transforms into the key to sustaining warmth and comfort during your outdoor escapades. Let's delve into the craft of packing your cooler for winter, turning it into a reliable companion for keeping food piping hot, preventing beverages from freezing, and safeguarding your gear from the elements.
Keeping Food Hot
As the seasons shift, your Iceland Cooler adapts its purpose. Instead of preserving the chill, it now becomes a guardian of warmth. Begin by choosing a higher quality cooler with substantial insulation, primed for heat retention. Preheat your cooler a day in advance, filling it with warm tap water, and let the insulation work its magic. Line it with aluminum foil for an extra layer of warmth and place a towel at the bottom to shield the cooler and add insulation. Strategically use insulated water bottles filled with boiling water to envelop your food, ensuring it stays hot throughout your winter adventure.
Preventing Beverages from Freezing
In the heart of winter, your cooler's role extends beyond preserving the cold — it prevents beverages from succumbing to the icy grip of frost. Ensure your drinks aren't entirely submerged in ice; employ the art of layering. Just as layers shield your body from the cold, they also protect your beverages. Wrap drinks in insulated layers and arrange them carefully in the cooler, preventing freezing and the peril of exploding cans due to liquid expansion.
Keeping Clothing and Gear Dry
Beyond culinary exploits, your Iceland Cooler becomes a safeguard for your gear, especially during sports like snowmobiling or skiing. Opt for backpack coolers for hands-free convenience, storing an extra set of dry clothes or protecting delicate equipment like cameras. For ice fishing enthusiasts, the cooler ensures that bait remains free from the icy grasp of winter.
Conclusion
As you embark on winter's adventures, your Iceland Cooler stands as a versatile ally, adapting to the demands of the season. From keeping food warm to preventing beverage mishaps and safeguarding gear, its capabilities are as diverse as the winter landscapes you're set to explore. Unleash the full potential of your cooler, ensuring it remains an integral part of your winter expeditions for seasons to come. After each venture, remember to clean and store your cooler, ready for the next chapter in your cold-weather escapades.
Obviously, not all coolers are ideal for every situation, and when it comes to a beach day, you need one that suits the specific demands of sandy shores and sunny skies with a hint of salty wind. Here are some essential features to look for in the best beach cooler.
When we factor in all the variables for the best beach cooler, Iceland Cooler stands out as the top choice. Here's why Iceland Cooler is the perfect companion for your beach days.
Now that you know why Iceland Cooler is the ideal choice for your beach adventures, let's explore where you can buy it online:
When shopping online, consider factors like cooler size, specific features, and the best deals available. Online reviews can provide valuable insights and help you make an informed decision.
A beach day is a perfect opportunity to unwind and enjoy the sun, sand, and surf. But it's essential to have the right beach cooler to keep your refreshments cold, fresh, and convenient. Iceland Cooler emerges as the best beach cooler choice, with its exceptional cooling capabilities, durability, user-friendly features, and eco-conscious manufacturing practices.
When looking to buy the best beach cooler online, consider visiting Iceland Cooler's official website for a direct line to the manufacturer and access to a wide selection of products to help you make your selection.
]]>Before we dive into the where and how of buying a cooler, it's essential to understand why choosing the right one is vital for your camping experience. A good cooler can make or break your trip by ensuring your food stays fresh, and your drinks remain cold throughout your adventure.
There are several types of camping coolers available, each with its unique features. Let's explore them to help you make an informed decision.
Now, let's explore the essential factors to consider when selecting a cooler for your camping trip.
Soft-sided coolers are ideal for boating and fishing adventures. Their flexibility allows them to fit into tight spaces on boats, and they can keep your catch cold and fresh until it's time to cook or freeze it. You won't have to lug around a bulky heavy cooler or worry about limited storage space.
5. Family Vacations and Road Trips
Planning a family vacation or a road trip? Soft-sided coolers are the perfect travel companions. They can be stored in the trunk or behind the seat of your car without taking up too much space leaving more room for your belongings. Plus, their insulation ensures that you have cold drinks and snacks readily available during your journey.
6. Camping
For campers, soft-sided coolers offer a practical solution. They are easy to transport to your campsite due to the straps, and their insulation keeps your perishable items fresh throughout your shorter camping adventures. Many soft-sided coolers come with multiple compartments for organized storage, making snack time and mealtime a breeze.
7. Outdoor Work and Lunches
Now that you know when a soft-sided cooler makes sense for your trip, it's crucial to select the right one. Here are some factors to consider:
Keep it cold. Iceland cold.
Unmatched Insulation: Get ready for top-tier insulation that retains frosty temperatures for prolonged periods! Perfect for camping, fishing, and all your escapades!
Unrivaled Durability: Unlike conventional coolers, rotomolded coolers are crafted for endurance. They stand strong in the face of rough tumbles, UV exposure, and the weight of even the mightiest haul — a testament to their legendary fortitude.
Ice Retention: Rotomolded coolers excel in preserving ice, showcasing unparalleled insulation capable of sustaining chilly climates for days, ensuring your provisions stay fresh and beverages remain Iceland cold.
Airtight Seal: The airtight seal of rotomolded coolers prevents heat from seeping in and cold air from escaping. This ensures the contents of your cooler remain at the desired temperature.
Versatile Design: Many rotomolded coolers, including the Iceland Cooler, are designed with versatility in mind. They come with features like integrated bottle openers, anti-slip feet, and dual handles for easy transport.
Eco-friendly Choice: Investing in a durable rotomolded cooler reduces the need for disposable coolers, contributing to a more sustainable environment.
]]>
How to Properly Pack a Cooler with Game Meat
Intro
After an arduous and challenging hunt, with a little luck, you’ll be rewarded with some of the best quality meat available that you simply can’t get at the grocery store. You’ve worked hard to harvest a wild animal, so don’t get lazy now and neglect to properly take care of your game meat in the field.
Proper care of game meat after harvest is the single most important thing you can do to maintain the quality and freshness of the meat. Many people who complain of wild game having an off-putting flavor (often referred to as “gamey”) is the result of eating meat that wasn’t properly cared for and cooled down in the field.
One of the easiest and most foolproof ways to keep your game meat fresh until you get home is with a high-quality cooler and plenty of ice. When game meat is properly packed in a cooler, it can be kept fresh for days before you’ll need to finish the butchering process and freeze or immediately consume it.
Here are a few steps and tips for how to properly pack a cooler with game meat. We’ll go over why having a quality cooler is important, as well as other considerations so you can ensure the quality of the meat remains exceptional.
Start With a Quality Cooler
First and foremost, a high-quality cooler with thick insulated walls and tight seals will hold ice longer and reduce the amount of excess water from ice melting. A good cooler is an investment, but when transporting game meat from the field, especially for backcountry hunts when you may be far from home, it will be worth its weight in gold.
You’ll also want to make sure your cooler is big enough to hold your bounty of meat. A small cooler, like our 45 qt, may be sufficient for small game such as game birds and rabbits, but you’ll need a larger cooler, like our 110 qt cooler with wheels, for big game species such as deer and elk. To be on the safe side for big game animals, multiple coolers are a good idea.
Iceland Coolers feature thick, high-density foam and strong seals among many other features. With a variety of options and sizes, you can be sure to find an Iceland Cooler you’ll love that will hold ice as long as it takes for you to get home and start the butchering process.
Break Down and Trim Meat
The first step in packing a cooler with meat is to skin and break down the animal into more manageable pieces. This will allow you to fit as much as possible into your cooler. This will also save you time later when you butcher the meat into different cuts.
After breaking down the animal, make sure to remove any excess fat and tissue that you don’t plan to consume. Not doing this step may cause your meat to spoil quickly. In addition, remove any dirt, hair, or other debris from the meat, which will help keep everything clean and save you time later.
Wrap Meat in a Durable Plastic
Placing your meat directly on ice will keep it from spoiling but will seriously degrade the quality of the meat and make butchering more difficult. That’s why it's crucial to wrap game meat in a durable plastic such as large unscented black garbage bags so excess water doesn’t soak it and degrade the quality of your hard-earned meat.
It’s also important to make sure the meat is cooled down before wrapping it in plastic in the first place. If you were to wrap meat too soon after harvesting an animal, the residual body heat will quickly spoil the meat and ruin it entirely.
After skinning an animal, allow it to cool down by hanging it and letting it cool in the open air. Since most hunting seasons take place in cooler weather, this step shouldn’t take long. Once the meat is relatively cooled down, wrap it in the plastic tightly and tie or tape up the opening for a watertight seal.
Add Ice as Soon as Possible
You may not have ice immediately available, especially for remote backcountry hunts. In that case, it may be worthwhile to already have your cooler packed with ice, or at the very least drive to a convenience store to get ice as soon as possible after harvesting an animal.
Once you’re ready to pack your cooler with meat and ice, start with a thin layer of ice at the bottom, then the meat, then as much ice as you can fit on top. Ideally, you’ll want the meat to be fully encompassed by the ice, which is why broken-up ice is recommended instead of large blocks.
Drain Excess Water and Add Ice Every 6-8 Hours
If you have a long travel time between your hunting area and home, it may be worthwhile to check your cooler and drain excess water or replenish ice every 6-8 hours. This will ensure the meat is staying as cold as possible and it isn’t getting too soaked in case there are any holes in the plastic. Usually, water is not a bad thing to leave in your cooler, as it is a better insulator than air, but in this case, it is more important to make sure no meat comes in contact with it!
The thicker insulation your cooler has, the less often you’ll need to do this step, if at all. At the very least, undo the drain plug to let out any water from melted ice every so often.
Conclusion
Packing a cooler with game meat is not rocket science and only requires a small amount of effort to get right. If you follow these steps and take as much care and attention to your game meat as you did on the hunt itself, you’ll be rewarded with the best-tasting meat possible, and you won’t have to worry about “gamey” flavors.
As a closing note, the most important aspect of keeping game meat fresh for an extended period after a hunt is having a trustworthy cooler. Iceland Coolers provide exceptional insulation and will hold ice for 4-11 days depending on size and use! Set yourself up for success from the start and consider getting one of our many great options to prepare for your next hunting trip!
]]>Roto-molded Iceland coolers have the ability to retain ice for over a week if the conditions are right. While there are many facets to getting the most cooling time out of your cooler, the ice you use and the way it is used is the most important part. Here are some tips to optimize both cool down time (i.e. getting the inside of the cooler as cold as possible as quickly as possible) and overall cooling time!
Ice Type
Dry ice is always the all around best option for use in coolers. Of course, dry ice is not always available or realistic. The other options are smaller cubed ice and larger block ice. Both offer different advantages. Small, cubed ice brings the temperature of the cooler and its contents down much faster but it also melts much faster than large blocks of ice. Ideally, a mixture of both will combine faster cool down time with longer overall cooling time.
Ice Temperature
The starting temperature of the ice you use is important too. Ice that is just barely freezing at 32°F is right on the verge of melting. Try to achieve the lowest starting temperature of your ice you can and it will effect both cool down time and overall cooling time.
Ice Ratio
The ratio of ice to space inside the cooler will make a difference in overall cooling time as well. The more ice inside the cooler, the longer it will stay cool. Dead space sucks up the cooling power of the rest of the ice. Fill as much of the cooler with ice as possible, and when this is not possible, for instance when contents are being used and more ice isn't readily available, fill the dead space with something else like clothes, towels, or paper.
Melted Ice
The water from the ice that has melted is a great insulator and the best dead space filler! Tempting as it may be, don't drain it if you can help it. Its temperature is still likely in the 30's and is much better than more air for the remaining ice to have to cool.
]]>What is a roto-molded cooler? How is it different from other coolers? Why should I get a roto-molded cooler? These are questions we get asked regularly at Iceland Coolers.
Though we may be a little biased, science is in our favor here when it comes to the inarguable benefits of using one of our durable roto-molded coolers. Here’s why...
Not to get too technical here, but roto-molding, short for rotational molding, is a type of method used for giving our coolers their flawless shape. This process involves heating polyethylene plastic in pellet or powdered form and then pouring the liquid plastic into a molding, where it is evenly rotated and cooled to form a seamless, durable shell.
Once the plastic cooler shell has been made, it is injected with a polyurethane foam. On our coolers, this high-density foam is 2 inches thick, and surrounds the entire walls of the cooler, floor, and corners, including the lid. It’s safe to say that roto-molded coolers really keep your items insulated! No other way of constructing a cooler creates such an even layer of insulation. They’re practically indestructible, too.
Though roto-molded coolers involve injecting durable foam into the walls, injection-molded coolers are another ball-park, and a less impressive one, at that.
Injection-molded coolers use a melting process, like roto-molded coolers. But, instead of rotating the melted plastic to create a consistent shell, injection-molding applies high pressure to a stationary mold to distribute the plastic throughout the shape. This means that the corners of an injection-molded cooler are weaker and more prone to breaking and cracking.
As you may have guessed, regular coolers are made using the injection-molded method. Their outer shells are blow-molded using polypropylene plastic, which is far less durable than the polyurethane used in roto-molded coolers. Polyurethane withstands extreme temperatures, giving you more bang for your buck.
The plastic in a regular cooler is thin due to being stretched across the length of the mold, rather than being rotated evenly throughout the mold. Regular coolers also have lids that are made from a single piece of hollow plastic. All of this means that your items won’t stay insulated as long, which can be a huge deal-breaker if you’re hoping to go camping or on a hunting trip.
Though regular coolers are considerably cheaper than roto-molded coolers, they won’t feel cheaper when you have to constantly go through the hassle of replacing them. Roto-molded coolers are made to last, meaning costs are only higher upfront when you choose one of our tough and reliable roto-molded coolers. Also, high quality roto-molded coolers like ours offer replaceable parts for if you break or lose anything (but don't worry, our warranty covers everything except for abuse or neglect!)
See a discussion on the differences between marine and regular coolers here.
Though marine coolers are definitely a step up from cheap and flimsy regular coolers, they’re still far inferior to the mighty roto-molded cooler.
Marine coolers are more expensive than a cheapie cooler (we’re talking double the price). They definitely keep ice frozen for longer, reflect UV light better, and are slightly more durable. And, if you’re just looking to keep some beer cool with your friends, they’ll certainly do the trick. But they’ve got nothing on the toughness and ice-retention roto-molded coolers. Our 110 qt roto-molded coolers hold ice for 11 days in our tests!
If you’re ready to put your cooler to the test, try out one of our tough and durable roto-molded coolers. You won’t be disappointed, we guarantee it.
]]>The wild turkey, native to North America, is a favorite game bird among hunters of all skill levels. Readily available in Canada, The United States, and Mexico, these birds provide both excellent table fare, and a challenge that can humble even the most seasoned veterans. When it comes to turkey hunting there are no guarantees, every outing will be different.
Behind my desk, as I write about turkeys, are the fans and beards of some of my more memorable hunts. In front of me, and in view all day every day, is my personal best and favorite hunt to date. Each one of them carries their own story, but more importantly, their own different way in which they were hunted. All but one were hunted on public land. I live and hunt these turkeys in an extremely popular and pressured tract of about 300 acres. On most opening days there’s usually around 10 people racing to their spots hours before shooting light. With highly pressured birds, you must be able to change the variables that you control. Vary calling frequency and cadence and use different types of calls if you have them. Move spots if birds aren’t where they should be when they should be. Read the situation, the timing of the weather can be different from year to year. Some years the breeding season will start early, some years it will be late. Be ready to sit in different areas or hunt in spots earlier or later than you usually would. One opening day a couple years ago, a hunter bumped a bird that was walking towards us. We came back to that spot every day for a week before we saw that bird again, but this time the bird didn’t come in from the same path, nor did he come in at the same time.
The classic way to hunt turkeys, at least this is the most common method taught to beginner turkey hunters in Ontario, is the sit and call method. It is a tried and true way to hunt turkeys, and I’m willing to bet it has put more birds down than any of the other methods. Oddly enough my first bird wasn’t taken with this method. After you’ve done your scouting, find a nice wide tree to settle against, set your decoys and start calling. Growing up, we were taught to choose a tree taller than our head, and wider than our shoulders. This is for our own protection from other hunters in case they mistake our decoys for real birds. In that case, their shot would hit the other side of the tree, and not us. This method is great both inside the forest and at a field edge. With any method, the best way to increase your chances at getting a bird is knowing where they roost and what their path is throughout the day. I would also try to set up as close as you can get to their roost because it minimizes the chances of someone else spooking the bird or some other factor causing the bird to change its route. My first classic style bird was also the first time I had ever seen or heard of turkeys with multiple beards! Check em’ out!
This was my first successful method hunting turkeys. The Ontario government had recently allowed turkey hunting after a successful reintroduction program. Back then we had access to private land and this place was PRIME turkey country. There was a herd of cattle and somewhere around 60 turkeys grouped up. They stayed flocked together, which is not the norm. These turkeys were as predictable as predictable can be. They roosted on the back field, flew down around sunrise, lined up like soldiers, and walked along the fence until they reached the field with the cows. These turkeys spent the day among the cows, pecking at the dirt between them. We sat at the edge of the field at an elevated position. Like clockwork the birds came along the fence in single file. We were sitting on the other side of the fence in a little bit of brush. All we had to do was wait until a nice tom walked in front before shooting. Easiest hunt ever.
Hunting blinds are excellent turkey hunting tools. Not only do they give you more options in terms of finding a spot to hunt from, but they also give you some leeway if you’re not the most statuesque of hunters. My father is a huge fan of hunting from a blind, but he’s not one to go out and spend money on a bunch of popup blinds to put on public land. He will however spend a good day combing the forest floor for logs and branches to build natural blinds. These are great for public land because you can always have a spot to hunt somewhere. Another great reason to have multiple natural blinds is the ability to move when things are slow. Too many hunters will pack it in too early on days where the birds aren’t gobbling rather than just trying a different spot.
My biggest tom came on a day like this. We didn’t hear any gobbles and we got to the area late, so we didn’t get our first-choice spot. Sat for an hour…nothing. We moved about a hundred yards to another natural blind. After calling for 15 minutes, 3 hens came. They inspected the hen and jake decoy then proceeded to constantly cluck, cluck, cluck. Our natural blind was built around a large coniferous tree, so we were well hidden, but only about 5 yards from them as they continued to blabber on and walked around the blind. After about 15 minutes they left, no longer interested in the strong silent type that were our decoys. Just as I started to pack up, I spotted movement in the corner of my eye. I thought it was the hens again, so I lifted my head ever so slightly to get a better look. There he was in full strut, showing off to my shy decoy hen. I couldn’t believe he was there; no gobbles, no indication he even existed. He showed up completely unannounced. If I hadn’t been in a blind, there’s no way he would have made it as close to me as he did.
I don’t recommend this method on public land, if there are other hunters around, you’re bound to run into trouble sooner or later. For this setup, mobility is key. Have collapsible decoys that fit in a backpack, and a clip-on seat. Know the land well. Now is not the time to step on every single branch in the forest. If the birds come off of their roost and don’t come your way, move out and away before hooking back silently ahead of them. The trick here is to get far enough away that you can walk quickly as you pass them and be able to silently put yourself ahead of them along their route. Although this is the most exciting way to hunt turkeys, don’t do it unless you are sure that they are moving away from you. Often, toms will answer to your calls, but they will take their sweet time coming to you. Sometimes this could take hours, and they might even stop answering completely as they do a lap around the area you are seated. Again, run and gun at your own risk. I’ve done it at least once a season, and it has only worked once. Sure, you mitigate boredom, but the risk of bumping a bird is not really worth the heartbreak.
In my area it's been warmer than the last few years, and I fully expect the turkeys to be actively courting by opening day. The mosquitoes will be eager to feast, and I’m feeling the popup blind is going to be key this season. If I’m right, on opening morning there will be a glorious cacophony of gobbles.
]]>Author: John Sader
Big game hunting doesn’t end the moment an animal is recovered. It ends when you have a quality product on the table that your family and friends can enjoy. Many people do not invest the time and preparation required after an animal is harvested. Every hunter and angler can attest to having a less than enjoyable meal due to “gaminess". Each animal tastes differently than another, but that gamey taste is universally unpleasant (if you've ever tried merganser, you definitely know the taste). The good news is, with a little effort and some know-how, you can drastically improve the taste and quality of your well-earned game.
From all the hunters I’ve met, and all the articles I’ve read, I can safely say that hunters know better than to go running after an animal that was just shot. Adrenaline is one heck of a drug, and a wounded animal can run surprisingly far on adrenaline alone. Recently, my father shot a whitetail deer with his crossbow during the final days before the archery season. Running on one lung, that buck made it almost 400 yards before expiring. That is incredible, but if my dad had chased after that buck, it could have easily gone another 400 more. Not only does it become tougher to track a wounded animal, but that animal will build up a ton of lactic acid in its muscles. That lactic acid is a direct contributor to the toughness and gaminess of the meat come chow time. Be mindful of shot placement, weapon capability, and your own skill. Know your limitations and always strive for clean, ethical shots.
You’ve made that great shot, recovered the animal quickly, now comes the real work. However eager you may be to just dive in and start cutting, keep cleanliness in mind. Assess your surroundings, ideally you will want to begin gutting and skinning some place cool, dry, and with plenty of working room. In the early season, or on warmer days, the most important part of this process is to cool the meat. Spoilage can occur within hours, so definitely get to processing ASAP.
We generally prepare more for the hunt, and neglect preparing for afterwards. In my opinion, there’s no point in putting all that work if you’re not going to properly take care of the meat you’re going to consume. Having everything you need and knowing how to use it is imperative.
Slow is smooth, and smooth is fast. A sharp knife is key to making good clean cuts, take your time, be precise and you will waste very little meat. Be sure you have a sharpening or honing tool with you to refresh your edge as it will start to dull during field dressing.
You can do everything with just one knife, no need for a saw. Everything can be quartered out by just separating some joints. When removing the hind quarter for example, you can cut the meat around the hip joint, and pop it out. Anywhere there’s a joint, you can pop it out to separate. Practice on a leg of lamb and watch some YouTube videos. I promise you, it’s easier and cleaner than using a saw.
Most of your cuts should be blade up. This reduces the chances of cutting into the guts, which will spoil meat. Also, when skinning, keep that cutting edge up. Cutting down will introduce a ridiculous amount of hair onto the surface of the meat. Hair that you’re going to have to remove later.
This applies to birds and pin feathers as well as furbearing animals. Quicker than picking off the little hairs on the meat, is a quick pass with a blow torch. This doesn’t need to be done right away, but definitely before freezing.
Often overlooked by many that are new to the sport is the glands found on the hind legs. On whitetail deer during the rut, the tarsal glands on a buck go into overdrive. You do not want this oily, stinky residue on the meat. Keep this in mind, when cutting around the tarsal gland. The good news is that once you remove the hide, you don’t have to worry about it. Cut upwards and eliminate contact between these glands and the rest of the animal.
If you are going to butcher at home, best practice would be to gut the animal in the field. A lot of heat is trapped in the body cavity of a whitetail deer, their core body temperature is around 104F. When driving home is not a possibility, and field dressing is a necessity, then a different approach is needed. Quick cooling is the name of the game, and I like to take with me a good cooler or two, and plenty of ice. You can’t really replace the value on a good quality cooler. I would look at getting a durable, roto-molded cooler like an Iceland cooler. Iceland Coolers are great value for performance and are jam-packed with features and accessories aimed at the serious outdoorsman or woman (like a cutting board that doubles as a divider, how cool is that?). Have them ready in the truck so that when you’ve quartered and bagged your animal, it can go right into the cooler. Ideally, we want to have our meat quartered and in game bags before we pack out. Once we get to the truck, you can break down the legs into manageable parts (it’s as easy as popping some more joints.) Seal the meat in plastic bags to protect it from moisture before putting in the cooler. By the time you get home, the meat should have cooled sufficiently enough to make cutting, packaging and freezing a breeze.
From here, you can sort out how you want the animal broken down. I try to keep most of it in larger pieces, this cuts down on freezer burn, and gives me the ability to try many different recipes. Instead of cutting out say, 4 steaks, cut a larger piece that you can later defrost and cut 4 steaks out of when you want to eat. Vacuum sealing is not an absolute necessity if you don’t plan on leaving the meat in the freezer for more than a year. You can totally get by with plastic wrap and butcher’s paper. Do your best to dry the surface of the meat before placing in plastic wrap, and you’ll be totally fine.
Finally, no hunt is complete until you’ve eaten and shared the product of all this hard work. Burgers and sausages are great, but it’s always nice to try a new recipe every now and then. The internet is full of wild game recipes from fellow outdoorsmen.
Happy processing!
]]>